
Facelift Conversion & Upgrade Kits
A Ford Ranger PX1 to PX2 conversion involves replacing the front-end body panels—specifically the bumper, grille, bonnet, and fenders—to match the facelifted 2015+ model. This upgrade requires specific conversion wiring harnesses for headlights to adapt the older electrical system to newer projector or LED assemblies without triggering dashboard error codes.
Why Perform a Ford Ranger PX1 to PX2 Conversion?
The Ford Ranger PX1 (produced between 2011 and 2015) remains a mechanical powerhouse in the New Zealand ute market. With its robust 3.2L 5-cylinder engine and durable chassis, it rivals many newer vehicles in performance. However, its aesthetic—characterized by the smaller, rounded front grille and rectangular headlights—has begun to look dated compared to the aggressive, squared-off stance of the PX2 (Mk2) and PX3 (Mk3) models introduced from 2015 onwards.
A facelift conversion allows owners to retain the mechanical reliability and lower entry cost of the PX1 while achieving the modern, high-value look of a newer truck. Beyond vanity, this upgrade can significantly increase the resale value of the vehicle and allows for the integration of better lighting technology, such as LED DRLs (Daytime Running Lights) and Bi-Xenon projectors.

What Is Included in a Facelift Conversion Kit?
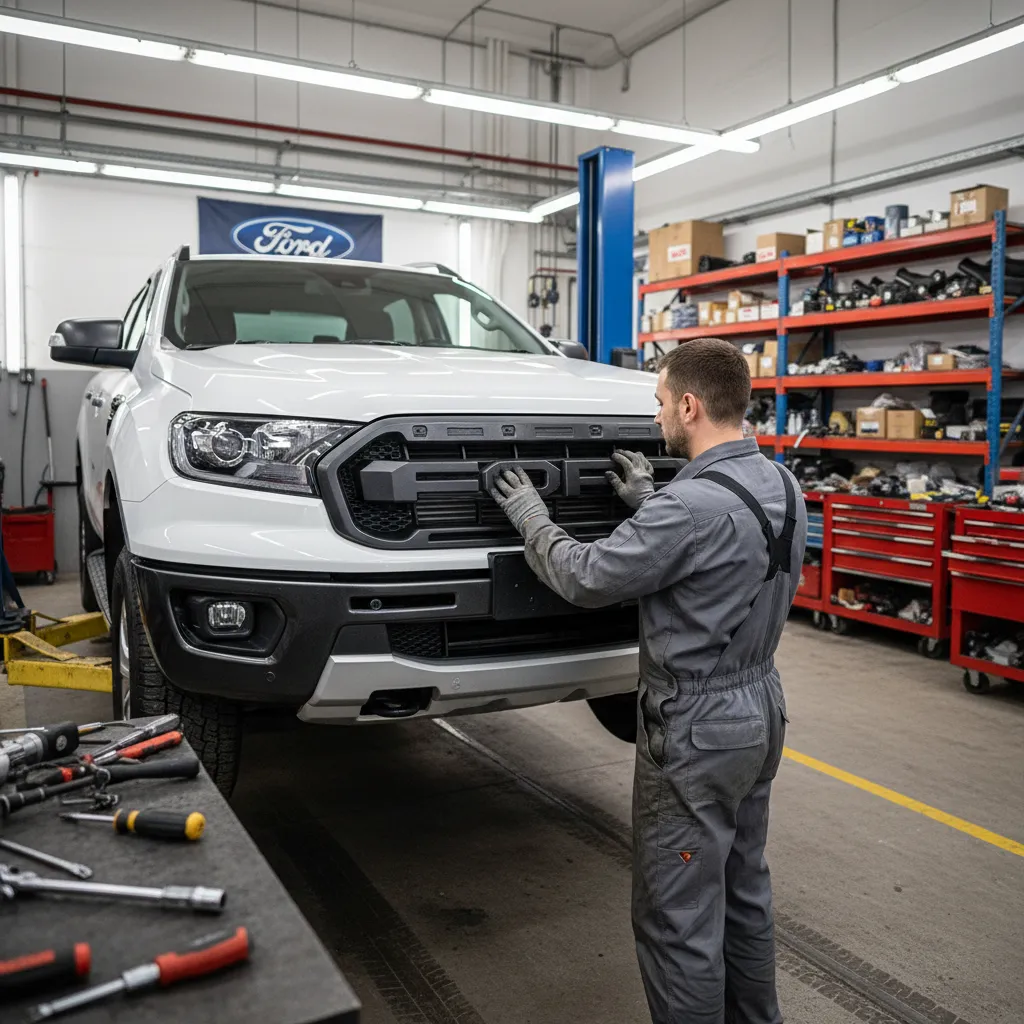
To successfully transform a PX1 into a PX2, you cannot simply swap the bumper. The geometry of the entire front end changed with the 2015 facelift. A complete conversion kit must replace several interlocking body panels to ensure seamless lines and factory-standard panel gaps.
Essential Body Panels
A comprehensive conversion requires the following genuine or high-quality aftermarket parts:
- Bonnet (Hood): The PX2 bonnet features different contour lines to match the new grille shape.
- Front Guards (Fenders): The side fenders must be replaced to accommodate the reshaped headlights and bumper meeting points.
- Front Bumper & Valance: The core of the visual update, often available in Wildtrak or Raptor styles.
- Radiator Grille: The prominent hexagonal or lettered grille that defines the PX2 look.
- Headlights: The shape changes drastically from the PX1, necessitating new units.
- Fog Light Surrounds & Brackets: Specific to the new bumper profile.
Additionally, you will often need the Radiator Support Panel or specific adapter brackets. While some aftermarket kits are designed to bolt onto the existing PX1 support, a full genuine conversion often involves swapping this structural component to ensure the headlights sit at the correct depth and angle.
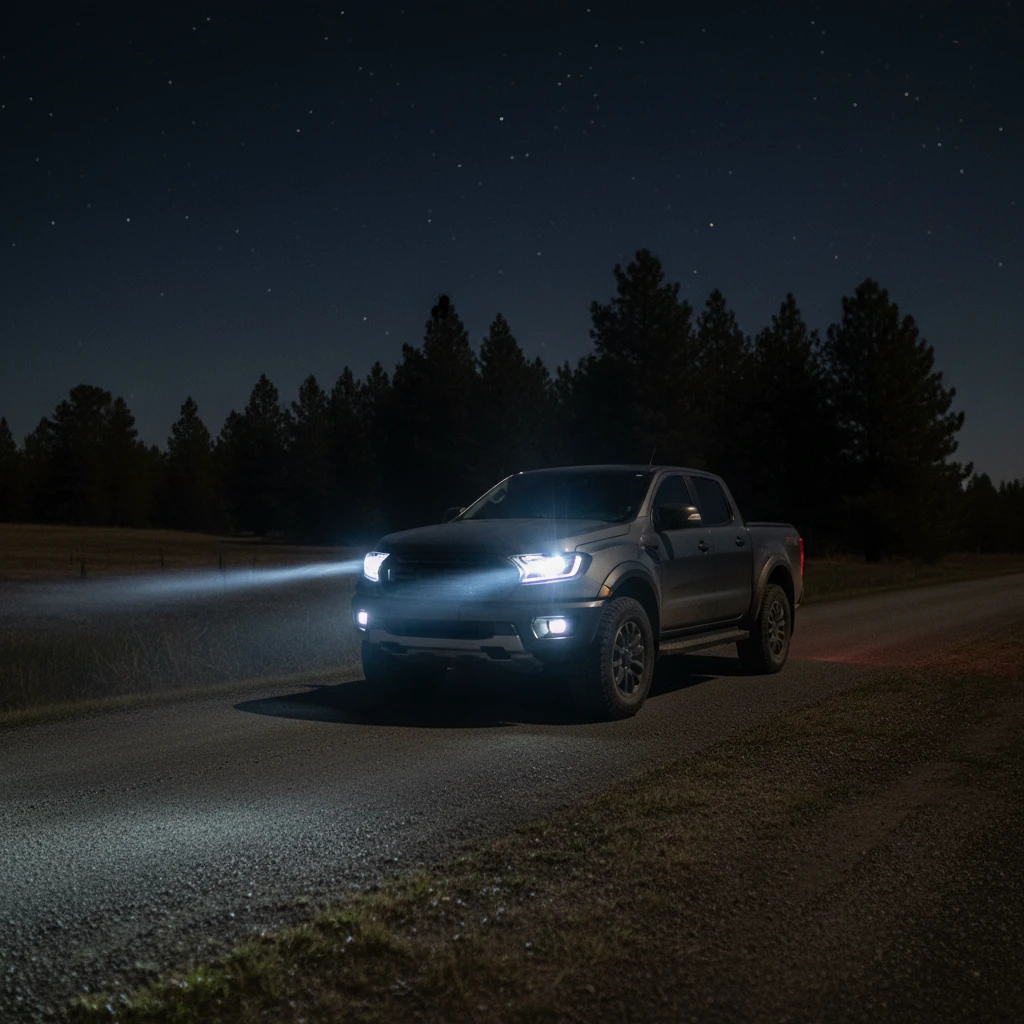
Headlight Conversion Wiring: The Critical Step
The most technically challenging aspect of the Ford Ranger PX1 to PX2 conversion is the electrical integration of the headlights. The PX1 and PX2 operate on different wiring architectures for their lighting systems.
The H4 to Projector Challenge
The standard PX1 Ranger utilizes a simple H4 halogen bulb setup where a single bulb handles both high and low beams. The PX2, particularly in XLT and Wildtrak trims, utilizes a more complex setup often separating the beams and integrating LED Daytime Running Lights (DRLs).
Simply splicing wires will result in failure. The PX1’s Body Control Module (BCM) monitors power draw. If it detects the resistance values of a PX2 LED or HID setup instead of the expected halogen bulb, it may cut power to the circuit to prevent damage, or throw a “check bulb” error on the dashboard.
The Solution: Conversion Harnesses
To fix this, you must use a specialized PX1 to PX2 Conversion Harness. These harnesses are designed to:
- Translate Plugs: Convert the factory PX1 H4 plug into the multi-pin connector required for PX2 or Mustang-style aftermarket headlights.
- Manage DRL Power: Tap into the ignition circuit (ACC) to power the DRLs so they run whenever the engine is on, a feature not natively supported by the PX1 headlight wiring.
- Resistors and CANBUS Modules: Include built-in load resistors to simulate a halogen bulb, preventing hyper-flashing indicators or BCM errors.
Grille and Bumper Upgrade Kits
Once the structural panels are sorted, the choice of grille and bumper defines the personality of your build. In the New Zealand market, there are generally two routes for the bumper upgrade: the Factory Facelift look or the Raptor Conversion.
The Wildtrak/XLT Facelift Style
This maintains the OEM (Original Equipment Manufacturer) appearance. It is ideal for commercial vehicles or owners wanting a clean, late-model look. These kits usually feature the standard trapezoidal grille and silver lower bumper accents.
The Raptor Style Upgrade
This is the most popular conversion. It mimics the wider, aggressive stance of the Ford Ranger Raptor. These bumpers are often slightly modified to fit the standard narrow-body width of a normal Ranger (unless you are also installing wide-body flares). Key features include:
- FORD Lettering Grille: Replaces the blue oval with large block lettering.
- Heavy Duty Bash Plate Integration: The bumper is cut higher to reveal the skid plate, improving approach angles for off-roading.
- LED Fog Lights: Often integrated into the bumper design.
Tech Integration for Older Models
Upgrading the exterior requires ensuring that the existing technology in your 2011-2015 Ranger continues to function correctly within the new 2015+ shell.
Parking Sensors
If your PX1 XLT or Wildtrak is equipped with front parking sensors, the new bumper must have sensor holes drilled in the exact factory locations. However, the sensors themselves may differ in diameter between generations. High-quality conversion kits provide sensor brackets that allow the older PX1 sensors to clip securely into the new PX2 bumper housings. Failure to secure these correctly results in false proximity alarms.
Adaptive Cruise Control (ACC)
For high-spec models with radar-based cruise control, the radar unit is typically located in the lower bumper grille. When installing a Raptor-style grille, you must ensure the mesh pattern does not obstruct the radar wave. Specific grilles are manufactured with a “radar window” to allow this functionality to persist without throwing safety system errors.
Installation: Paint, Fitment, and Alignment
While many kits are sold as “bolt-on,” the reality of bodywork requires professional attention to detail. The process generally follows a strict inverted pyramid of assembly:
- Dry Fitment: Before a drop of paint touches the panels, the entire front end should be assembled on the truck. This confirms that the bonnet latch aligns, the guard gaps are even, and the headlights sit flush.
- Preparation and Painting: Body panels usually arrive in raw plastic or primer. They must be professionally color-matched to your specific paint code. Note that aged paint on a 2012 Ranger may have faded, so a “factory standard” mix might look too dark. Blending into the doors is often recommended.
- Final Assembly: Once painted, the parts are installed. The inner guard liners (plastic wheel arch liners) from the PX1 often fall short of the new PX2 bumper edge. You will need to install PX2 specific liners or modify the existing ones to prevent mud and debris entering the engine bay.
NZ Compliance and WOF Considerations
In New Zealand, modifying the lighting and structure of your vehicle has Warrant of Fitness (WOF) implications. When performing a PX1 to PX2 conversion, you must adhere to LVVTA (Low Volume Vehicle Technical Association) guidelines regarding lighting.
Headlight Alignment: The new headlights must be aimed correctly. A common failure point in WOF inspections after a conversion is the beam pattern being too high or scattering light (common with cheap LED bulbs in halogen housings). Ensure your new headlights are RHD (Right Hand Drive) specific; purchasing kits from US or LHD markets will result in a beam pattern that blinds oncoming traffic and fails WOF immediately.
Structural Integrity: As long as the radiator support modification does not involve cutting the main chassis rails or crash structures, certification is generally not required. However, if you are fabricating custom mounts for the bumper that alter the crash pulse sensors (airbag triggers), you may require LVV certification.
Cost Analysis: Is It Worth It?
A full conversion is an investment. In the current NZ market, a complete parts kit (bonnet, guards, bumper, grille, lights) ranges from $2,500 to $4,500 NZD, depending on whether you choose aftermarket or genuine Ford parts. Painting and labor can add another $1,500 to $2,500.
However, considering the price difference between a 2012 PX1 and a 2016 PX2 can be upwards of $15,000, the conversion remains a cost-effective way to modernize your fleet or personal vehicle without the capital outlay of upgrading to a newer chassis.
People Also Ask
Can I just swap the bumper without changing the bonnet and guards?
No, you cannot. The PX2 bumper has a different profile that interlocks with the reshaped PX2 headlights and grille. The PX2 headlights are narrower and more angular, meaning they leave large gaps if used with PX1 guards, and the PX2 grille requires the PX2 bonnet lip to close correctly.
Do I need to replace the radiator support panel?
In many cases, yes, or it requires modification. The mounting points for the headlights and the headlight locking mechanism differ. Some high-end aftermarket conversion kits include specialized brackets that allow you to mount PX2 parts to the PX1 support, avoiding the need to cut or replace the metal support panel.
Will the airbags still work after the conversion?
Yes, provided the front impact sensors are correctly transferred to the new front end. The sensors are typically mounted on the chassis rails or the radiator support, not the cosmetic bumper cover itself. Care must be taken not to disconnect the battery while working on airbag systems to avoid error codes.
How do I fix the hyper-flash indicator issue after installing LED lights?
Hyper-flashing occurs because LEDs draw less power than halogens, tricking the system into thinking a bulb is blown. To fix this, you must install load resistors across the indicator circuit or use a conversion harness that has these resistors built-in.
Are Mustang-style headlights legal in NZ?
Yes, Mustang-style headlights are legal in New Zealand provided they emit the correct color light (white/amber), function correctly (indicators must be amber), and are aimed properly for Right Hand Drive roads. They must carry appropriate E-mark or DOT certification to ensure quality standards.
Can I install a PX3 (2018+) bumper on a PX1?
Yes, similar to the PX2 conversion, a PX3 conversion is possible but requires even more parts. The PX3 has a different bumper and grille arrangement again. The process is virtually identical: you need the full front clip (bonnet, guards, lights, bumper) to make it fit a PX1 chassis.